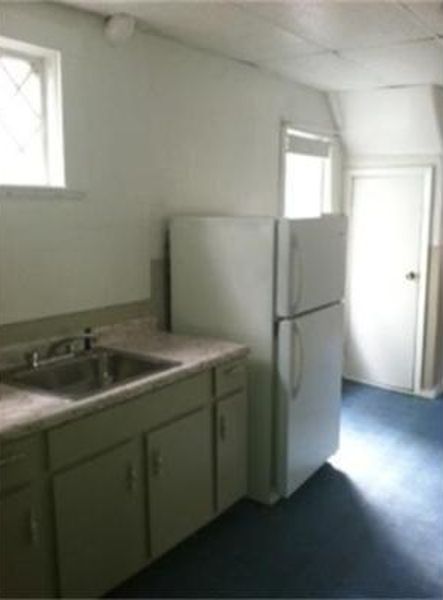
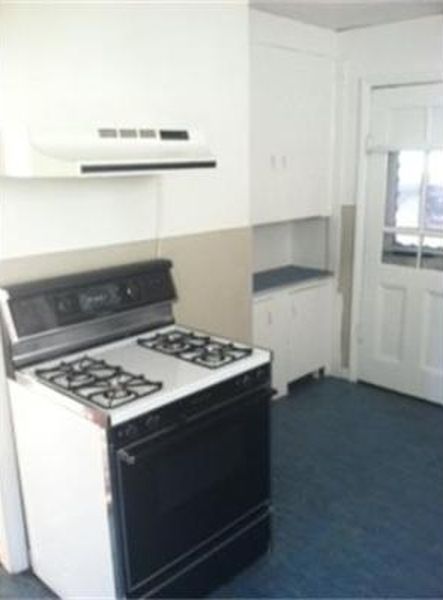
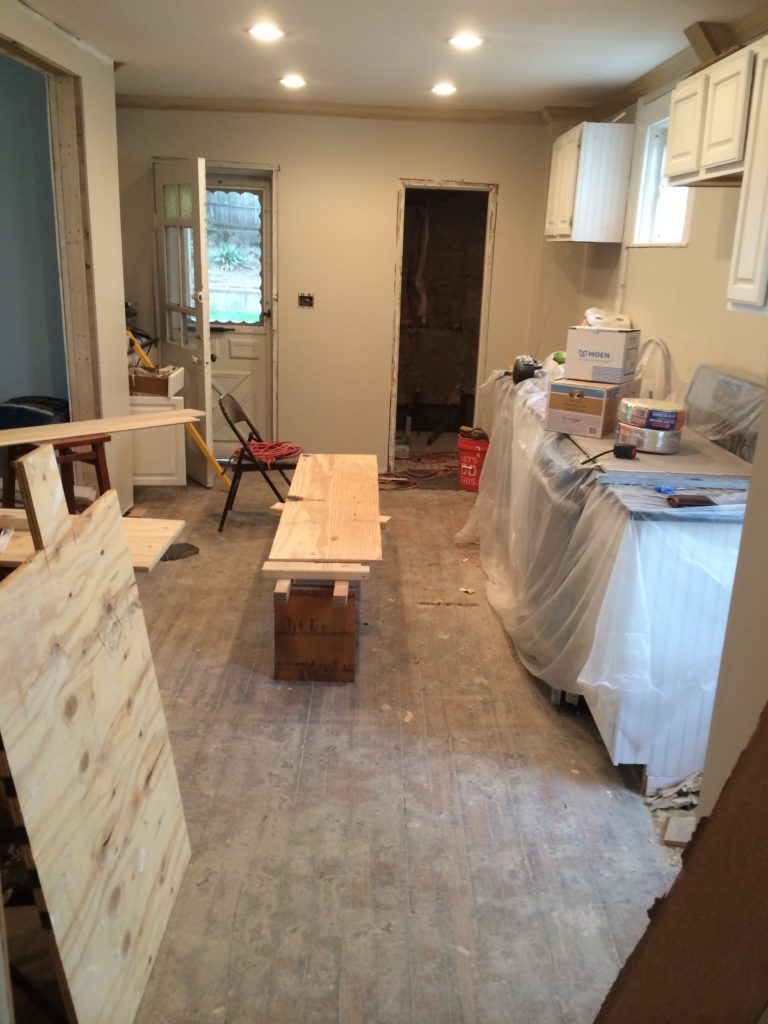
Kitchens are where it’s at. They’re where we spend the majority of our time at home and where we gather with friends and family to enjoy fun times and good eats. As the pulse of the home, it’s important for them to be inviting, organized, and functional. Our kitchen was the complete opposite when we first bought our house. True to many of the other properties in our budget, it was dark, dingy and had almost no useful surfaces. That said, it was essentially a blank canvas with lots of potential, so we ran with it. Though kitchen renos can be challenging and expensive, they are one of the top value-adding projects you can tackle. Here are my seven best pieces of advice to help you transform your kitchen and save some dough along the way.
1. Maximize Your Storage Space.
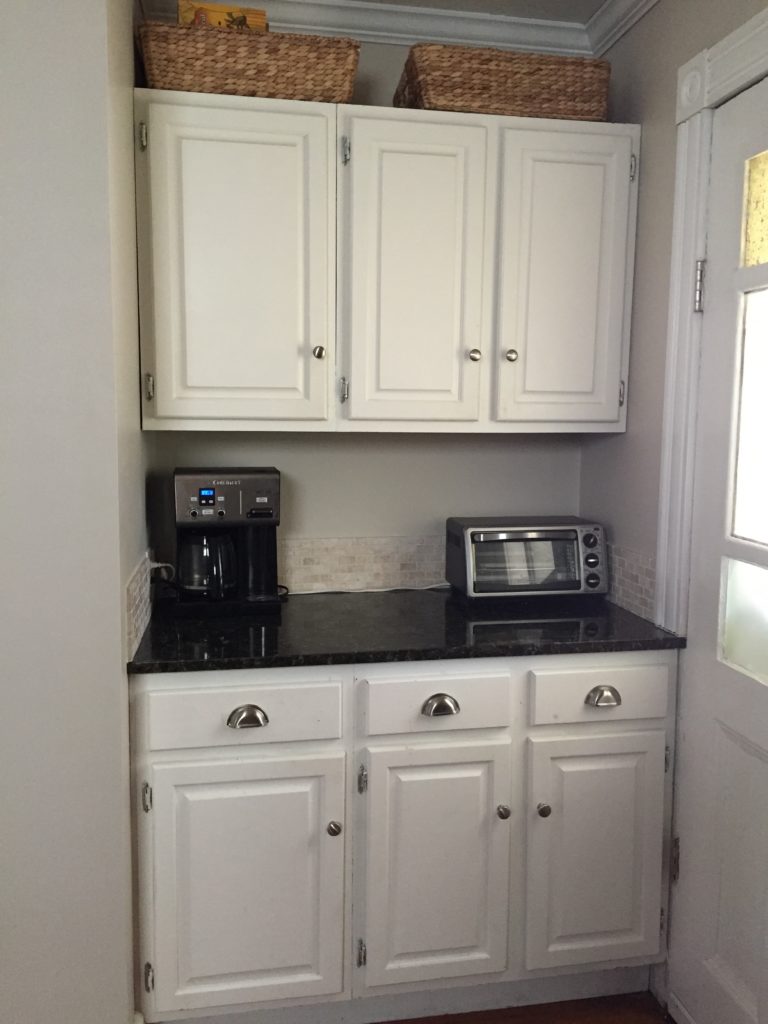
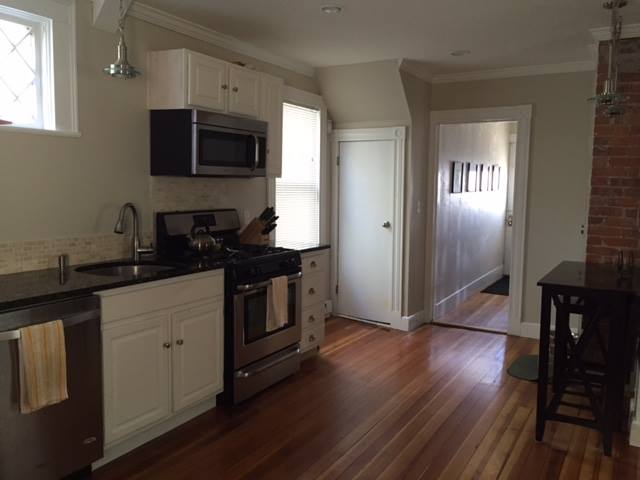
There’s nothing worse than cluttered countertops, or having to make trips to other parts of the house to grab a baking dish or roll of paper towels. Extra storage can come in the form of cabinets, shelves, baskets, islands, pantries, etc. Look for clever ways to create additional places to put things. In our case we created a pantry by closing off and adding shelves to an awkward (aka unusable) 3 feet of space next to our dining area and nearly doubled the number of cabinets in our kitchen. To take things a step further, do your best to create storage solutions for the specific kitchen gadgets you own, so that every item has a home.
2. Expand Your Horizons.
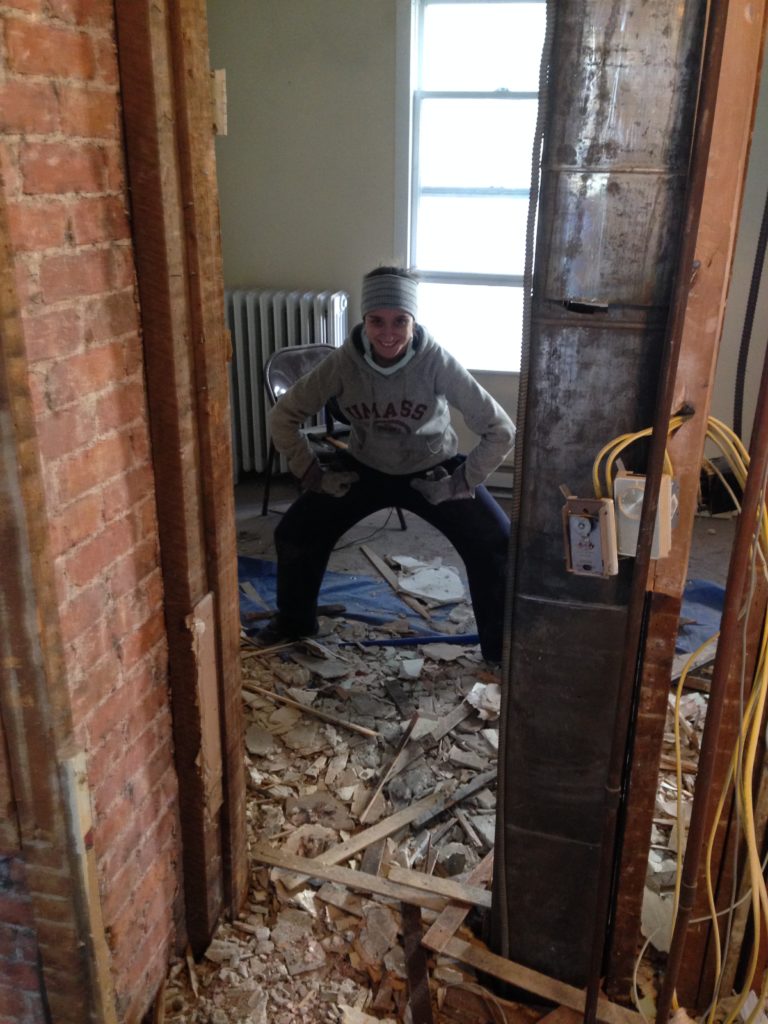
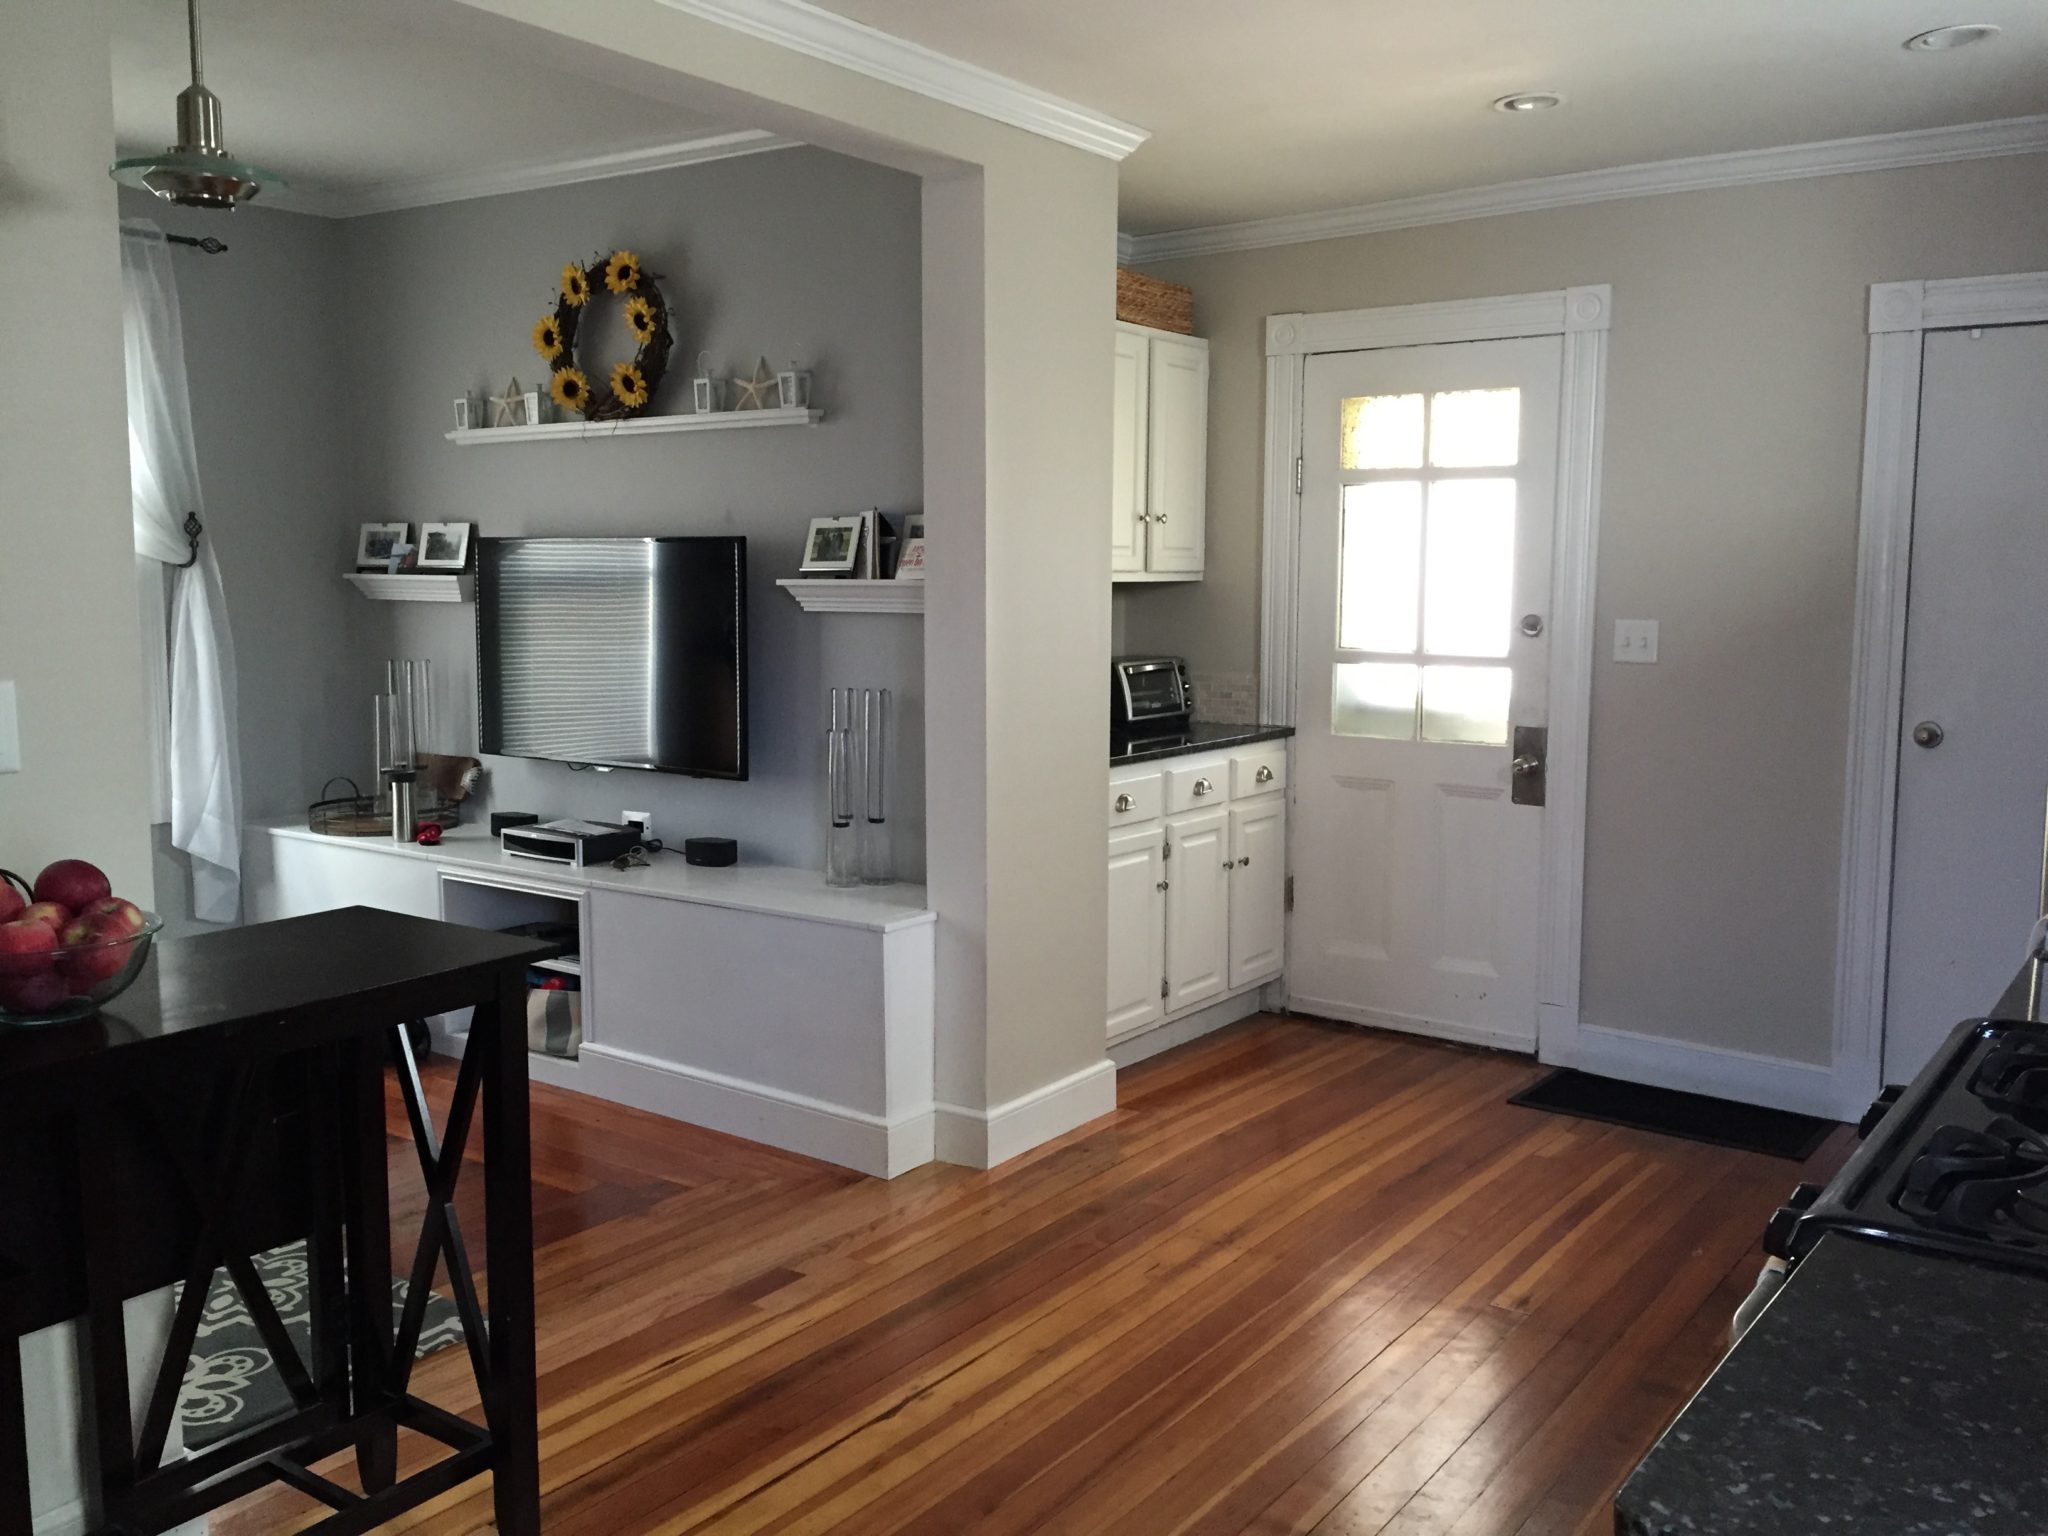
The wall between our kitchen and living room to-be (originally the bedroom) didn’t last long after we closed. Opening up the kitchen to the living area was a key component in maximizing every inch and creating the feeling of a larger space in the 700 square feet that is our first floor unit. Breaking down the barrier also made for uninterrupted entertaining – we could prep, serve, and never miss a beat with our guests. Though taking down walls is a major job, you can help keep costs down by doing a lot of the demo and finish work yourself – just make sure you leave load bearing wall removal and support placement to the pros.
3. Don’t Just Go with the Flow, Create It.
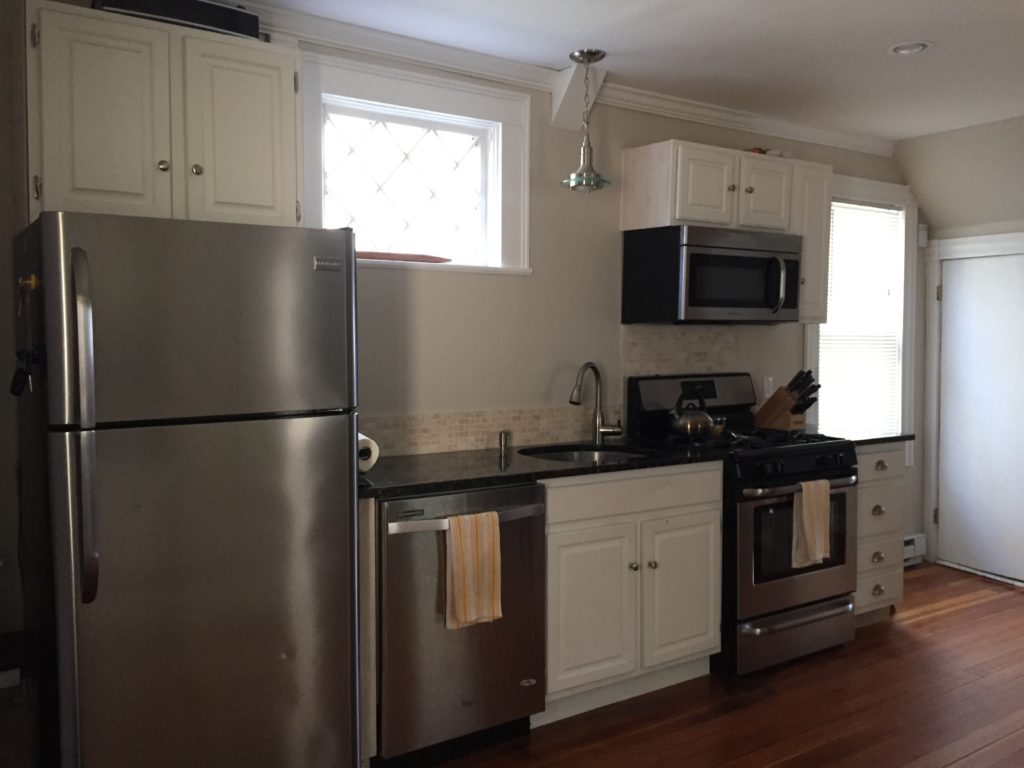
A lot of time and effort goes into cooking and clean-up. A well thought out kitchen layout can help make these tasks much more efficient and enjoyable. The physical space itself will help you determine a general floor plan. Common kitchen designs range from One-wall, or Galley kitchens in lofts and smaller spaces, to Horseshoe and L-shaped kitchens (with or without islands) in larger spaces. When planning the arrangement, consider grouping appliances & fixtures with similar uses together to create specific work zones within your kitchen. For us that meant moving the stove to the opposite side of the kitchen and adding an over the range microwave to create our “cooking zone” as well as positioning our dishwasher next to the sink for the “cleaning zone.” We also made sure to leave plenty of counter space next to major appliances to serve as landing areas for food, plates, etc. as well as spacious walking paths.
4. Know Your Standard Kitchen Measurements.
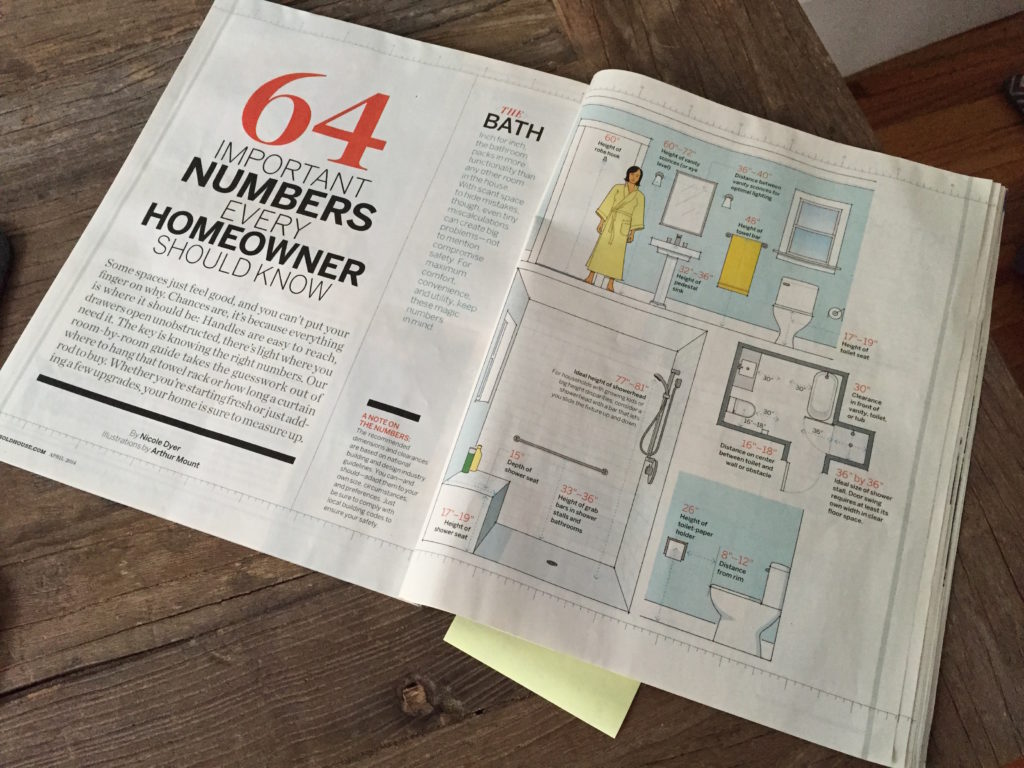
Not how many ounces in a cup, but rather standard measurements & placements for appliances, cabinets and counters. As fate would have it, the April 2014 issue of This Old House magazine showed up in the mail just as we were beginning to install our kitchen. This issue just happened to have an entire section dedicated to these essential measurements – we happily took the advice. Following the general industry guidelines will help ensure that your kitchen will be both functional and safe. Standardizing can also help save you money by helping you to avoid having to buy custom sized appliances, cabinets, etc. If you plan on a DIY kitchen install, my biggest piece of advice is to tape out your layout with exact measurements before you begin any sort of work – this will ensure that your design will fit and provide correct clearance for all of the items and architecture (doors, windows, etc) in your space.
5. Don’t Pay Full Price for Your Materials.

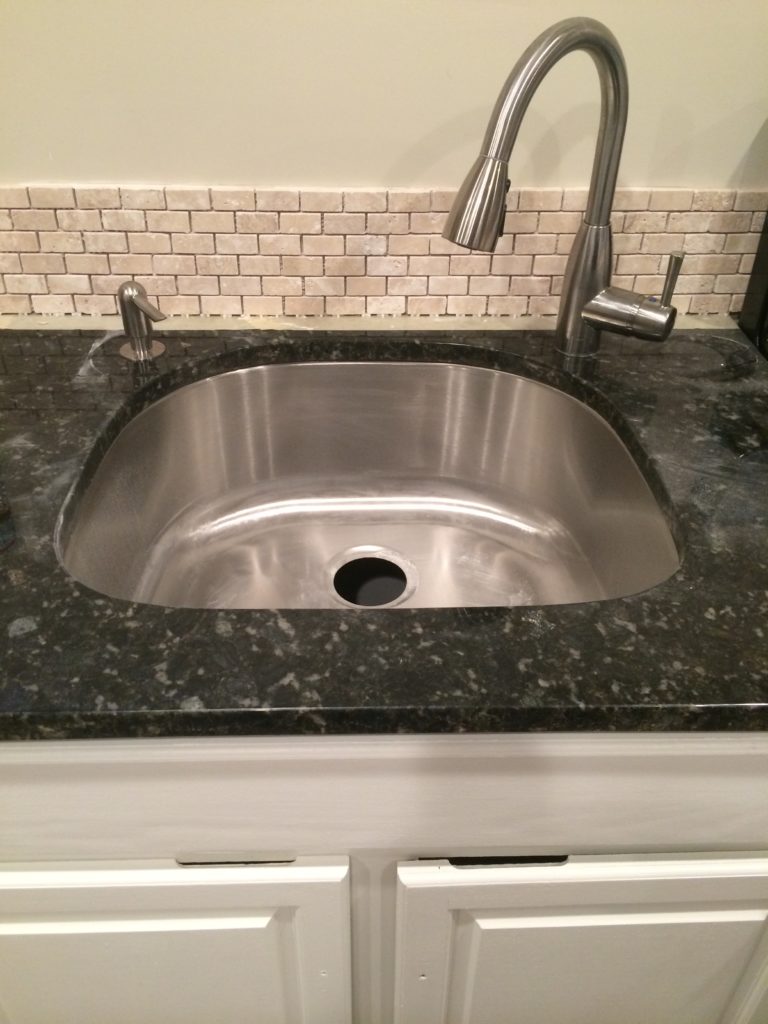
One of your largest expenses, regardless of whether or not you’re attempting a chunk of the labor yourself, will be materials, appliances, and fixtures. The great thing is that you can significantly reduce these costs through some clever sourcing. Our cabinets were a steal on Craigslist, our appliances came from discounted scratch & dent inventory (it’s going to happen anyway!), and our granite came from remnant stock at a wholesale stone company. Many of our fixtures (pendant lights, faucet, stainless under mount sink) came from a number of resources for recycled building materials. Sometimes your house will help you out in this department too – our hardwoods were already in place, hidden under ugly blue linoleum. With a little extra effort and lots of sanding, they’re back to being their beautiful selves. If you’re creative, patient, and determined, you’ll be amazed at how much you can save!
6. Light It Up.
Lighting is an important part of any room, but especially kitchens. Brightening up your kitchen will not only help it feel more inviting, but will also improve your ability to work in the room. We bit the bullet and replaced the two shadow casting dome lights with a set of recessed lights. Additionally, we used some pendant lights to define the dining area and to add character to the sink area. While we had our electrician in for the lights, we also made sure to add some conveniently placed electrical outlets throughout the kitchen. It was a slight additional cost, but we were so thankful for them later!
7. Add Character and Your Own Personal Touch.
There are so many ways to add character. Architecturally, you can do this through an interesting backsplash, moulding, or unique fixtures. On the design end of things, add some artwork, a neat set of table and chairs, or cool cabinet hardware. Options are endless, so if you’re feeling overwhelmed, check out design books, magazines and Pinterest.